An average American looks into their phone around 262 times a day. And from which 88% of mobile time is spent on checking apps. Astounding facts, but true enough to reveal the reality of today’s time. The Android apps market is larger than iOS. Android has around 3 billion active users while iOS has only 1.8 billion. Since Android apps can reach to more user base, businesses want to know how to build an Android app.
Small to large businesses and even startups want to develop an android application. So, they can fetch more traffic and customers to their businesses. It gives growth to the Android app development business as well.
Today, school and college students want to make their career in Android OS because they have more job opportunities in it. In this post, I will help you clear all your doubts about Android development so that you can build an Android application for your or any other’s Android device.
Let’s get started!
Why Are Android Apps Getting Popular in 2026?
Users are projected to spend around $60 billion on the Google play store by 2023. So, more investment will lead to more apps on the store.
Most businesses want on-demand app development because of the different business models. In 2026, more people will come into a business and since online business is booming more than any other form, they all will need Android apps. So, demand for an Android application can increase more than in previous years.
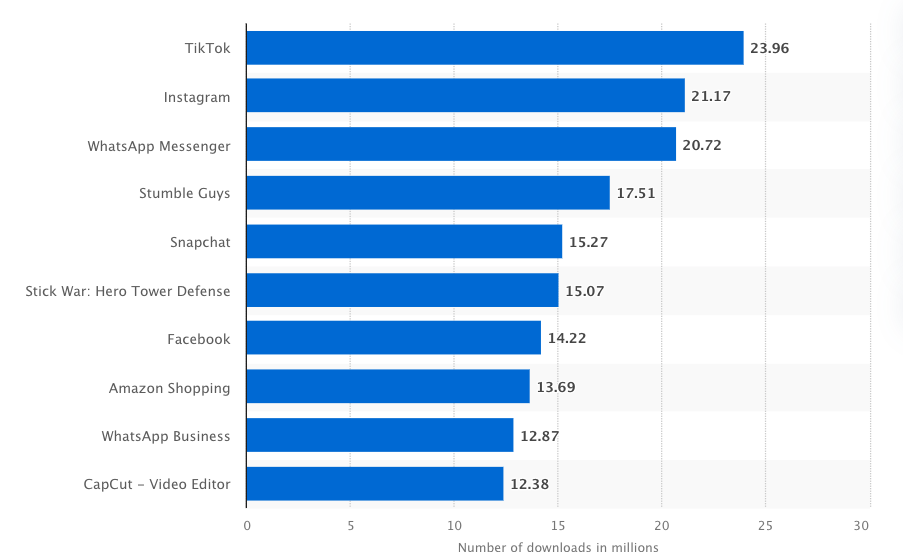
Various top Android apps in 2022 can also continue to rule in 2026. They will also have some similar apps in the upcoming years.
Apps can become cheaper in 2026 than traditional software so more people can afford them. The in-app purchases and push notifications features can attract more app users. Since more investment will be there in Android apps, you can notice an ample number of new projects under a single on-demand app development company.
Benefits to Build Android Apps
All business entrepreneurs want to be successful. And they know how crucial is to have an app for a business. So, if you want to know how to build an Android app for the growth of your business, you must be aware of some benefits of having an app. Although there are many reasons to build apps, I have curated some of the benefits of Android applications.
Higher ROI with Lower Cost
Versatility and Scalability
Customization
SEO Optimization
1. Higher ROI with Lower Cost
Android SDK (Software development kit) helps designing team build effective apps on time. Developers have to register only once and they can use various features of SDK for many devices for building apps. It supports programming language comprehensively and allows engaging and feature-rich app development.
2. Versatility and Scalability
Android apps are known for Versatility and scalability. Android Studio helped in the same a lot. It integrates with the entire ecosystem for your first android app. You can build android apps for Mobile, wearables, Tablets, Android TV, and smartphones. Moreover, developers can build an app layout effectively for a new android studio project.
3. Customization
In the first android app, you are often confused about features and functions. But don’t worry as Android allows you to do countless customization. Android studio has various features that you can customize as per your need. It helps you build an Android app as per your business need and deploy it on the Google play store.
4. SEO Optimization
The android platform also allows developers to implement SEO strategies that are vital to rank your app on the Google play store. It is a crucial point for marketing purposes. Nowadays, an SEO app optimized is more likely to appear on top than the other apps.
Where to Learn Android Development?
Today you can’t complain about not having enough material to learn, because the internet offers an ample amount of materials, pdfs, and videos to learn Android app development. However, an abundance of information is also not good as it confuses you. So, I present you with some reliable sources to create apps below.
Online websites: Udemy, Coursera, Pluralsight, Codeacademy, Skillshare, and others.
Online Tutorials: Online Studio and Java, Android game development, Freecodecamp, Edureka, and others.
Books: Android Programming: The Big Nerd Ranch Guide, Head first android development, Java programming language for Android developers, Android programming: pushing the limits, and others.
Steps to Build Android Mobile App with Android Studio
Android app development is a long process because a developer has to consider various things while developing an app. It is not the job of a single person, a complete team works to develop an Android app. It includes designers, developers, project managers, testers, and others.
If you are planning to establish it on your own, focus on the below steps.
1. Create a New Project
First of all download and install Android Studio. It is a platform to build Android applications and offers various features for complete app development. Click on “Create new project” for Android app development.
2. Select Empty Activity
As you click on the new project, you will see some project formats. Now Select “Empty activity” and click “Next”.
3. Configuration of Project
To configure your application follow the below steps.
Enter “MyFirstApplication” in the name field
Now mention the name “com.myfirstapllication” in the “package name” field
Enter the “Save location”
From the language drop-down list choose Java or Kotlin
Go for Kotlin for this project
Go for the lowest version of Android so that your app can support minimum SDK field
At the end click on “Finish”
4. Add Button to Your XML file in Split Window
1. Follow the steps provided below to open the “activity_main.xml” file
Click on the “App”. It displays on the left side of windows
Select “Res”
Click on “Layout” file
Now choose the “Activity_main.xml” file
Now you have to add the below code in the XML file between the tag
Move to “Gradle strips”. It Displays in left side windows
Click on the “Build. Gradle” file (Second file under Gradle scripts
Mention the code provided below in the “build.Gradle” file to enable “viewBinding”
Click on the “Sync Now” text (It shows up on the right side corner of the screen)
buildFeatures {
viewBinding true
}
6. Code to Display Message
How to open MainActivity.kt file
Click on “app”
Click on “Java”
Click on “com.myfirstapplication”
Click on the “MainActivity” file
Now comes the coding part of your Android app
Step 1:
/*Create ViewBinding OBJ*/
private lateinit var binding: ActivityMainBinding //(Activity + XML Name + Binding)
Step 2:
/*Attach XML to view binding obj in onCreate function*/
binding = ActivityMainBinding.inflate(layoutInflater)
setContentView(binding. root)
Step 3:
/*Create function for button click and call in onCreate function after setContentView*/
private fun setListener() {
/*set button click*/
binding.btnClickMe.setOnClickListener {
/*Create toast widget for display message on screen*/
Toast.makeText(this, “Your first application is created.”, Toast.LENGTH_LONG).show()
}
}
Step 4:
/*Run application*/
7. Click on Run Button
8. Run App in Emulator
Now you can say that you have successfully developed an Android app using Android studio. Technource has built various applications for different sectors like education, communication, healthcare, food and beverages, travel, real estate, and others. Our designers give an innovative touch to the apps with their creative skills. You can check out the blog strategies to follow for designing your android application by our designers for detailed information.
Tips to Use Android Studio Fast
Here are some of the main practices to use Android studio effectively. They are shortcuts to help you complete a task on time.
Table-
Task
MacOSX(Press)
For Windows/Linux
To extract methods
⌥ + ⌘ + M
Ctrl + Alt + M
To Delete
⌘ + Backspace
ctrl+y
To Duplicate Code
⌘ + D
Ctrl+D
To Search Files
⌘ + ⇧ + O
Shift + Ctrl + N
To Search Enumerations, Classes, and Interfaces
⌘ + O
Ctrl + N
To Search Symbols
⌘ + ⌥ + O
Shift + Ctrl + Alt + N
Here’s How to Deploy Your Android App on Google Play Store?
After you have done building an app with the help of app builder Android studio, now it’s time to launch it. Publishing apps also require you to be careful other google play store can reject your app. To avoid any rejection you can take the help of app builders because most of them also help in deploying apps on Google play.
If you are going to upload an app on Google play on your own, here are the steps.
Google Play Developer Console
Create Application
Store Listing
Upload App Bundles or APK to Play Store
Content Rating
Fix App Pricing and Distribution
Publish the Application
1. Google Play Developer Console
The developer console helps Android developers to submit an app to the play store. It works like a backend-controlling system. There is a one-time fee of $25 for registering as a developer to upload an android app.
You will have to provide details like name, country name, and others. You will have to wait at least 48 hours for account approval. Once the account is approved, you can upload your app to the Google play store.
2. Create Application
To create an application, you have to follow the below steps.
Go to the “All Applicatios” tab.
Choose “Create Application”.
Go to the drop-down menu to choose a default language.
Mention the title of your app
And click on “Create”
3. Store Listing
Look at the image. Now you know that you need to fill in some information about the app. Be careful while writing keywords for your app. Keywords should be appropriate and related to your app. It is because the right keywords increase the chances of appearing app in app searches.
Have a look at the points below to help in the same.
Title
Short Description
Long Description
Screenshots of your app (JPEG or 24-bit PNG) (Min – 320px & Max – 3840px)
Feature Graphic “(1024 w x 500 h) (JPG or 24-bit PNG (no alpha))”
High-resolution Icon “(512 x 512) ((with alpha) 32-bit PNG)”
Type of application
Category of your app
App developer or company’s email
Rating of the content
2-8 Images are allowed
URL for the privacy policy
Focus on these points while filling in information. You can practice writing them before you register as a developer. It will reduce the chances of mistakes while writing the actual details in the form of Google play. Many people find it difficult so they want their app builder or developer to do the same. Many offshore companies provide this type of service as well.
That’s why several businesses like to hire developers from different countries.
4. Upload App Bundles or APK to Play Store
This is the next step in the series of uploading an app. Here you have to use some files. These are like app bundles and APK and sign the app release. Moreover, upload all of them into your application.
Follow the below-provided points for an impeccable use of files and upload android applications without mistakes.
Select the “App releases” tab
Click on either an internal test, close test, production release, or open test
Choose “Create release”
Move to the new release for production on page
Now select the play store app sign on to the app
Select the “Opt-Out” option
Click on “Browse files” and Upload APK to the play store
Confirm information by clicking on ‘Review’
Now click on “Save”
5. Content Rating
It is a crucial step to follow while uploading your app to the play store. It lets you know the score of your app content.
If you skip the step, it will show “Unrated”. it can result in removing your app from the app store. So, be heedful while filling in information and try not to skip any one step. Consider the steps provided below.
Click on “Content Rating”
Select “Continue” and type your email address
Now click on “Confirm”
Fill in the Questionnaire. It is helpful for rating an app
See the app rating by clicking on “Calculate rating”
Click on “Apply”. You are done
6. Fix App Pricing and Distribution
First of all, decide in which countries you are going to launch your app. It is because according to countries the price can vary. Likewise, Google doesn’t support publishing apps for all regions. So, you have to select countries manually where you want to launch it.
If you choose “Free” then you must know that it is permanent. You can’t convert free apps into paid ones. Google doesn’t allow for the same.
If your application is suitable for children under the age of 13 children, select the option “Yes” for the Primary child detected. If not the case, select “No”. Furthermore, select options for allowing or not allowing ads on your app.
7. Publish the Application
You have to go to the section “App releases” to publish the app. After this follow the below steps.
Choose “Manage Production” and “Edit Release”
Click on “Review”
Choose “Start Rollout to Production”
Now click on “Confirm”
After the last step “Confirm”, you can say that you have successfully uploaded the app to the Google play store. But, you will have to wait for some time until the app gets approved. The time for approval varies, sometimes it can approve in just 2 hours, and sometimes it can take days.
It happens because of the type of app people upload. So the app checking criteria are different for the different apps.
Final Words
The abundance of Android apps shows how common the apps have become. If someone thinks of business with the help of Android apps, it has a high chance of getting success. But as we know nothing comes easy, so you have to focus on various things while developing an app.
You take the help of professional developers of Technource if you don’t want any mistakes to take place in your app development and deployment. Technource has experienced developers who have worked on various technologies, tools, and frameworks. They understand your business requirements thoroughly and make prototypes of the app, considering clients’ and customers’ feedback for impeccable software solutions.
Frequently Asked Questions
Many programming languages are used for Android app development. But, Java and Kotlin are the popular ones. For your first Android app JavaScript can be the best choice because you can easily find an Android development team.
Android app development cost depends on various factors. It is because of different app ideas, versions, development environments, technologies, and requirements of clients. To meet all these things often the price goes up and down. Well, the estimated Android mobile app development cost range from $5000-$50,000.
Developers in different regions ask for different prices to build android apps. In the USA android developer’s cost is $100-$150, while in India it is just $20-$30.
Android application development is a long process because various stages are involved in it. 3-5 months are required for building android apps. If the project is complex and needs advanced features and the use of the latest technologies, creating apps for Android devices can take around 8-12 months.
Well, the answer completely depends on the type of designs, features, and functions you want in the app. Generally, iOS apps require less development. They are often cheaper to build than Android apps. So, yes, developing apps for Android projects is harder than for iOS.
To hire Android developers for mobile apps, focus on the below points.
Understand the app idea thoroughly
Make a list of all the requirements
Look for the best app development firms
Check the portfolio of developers
Discuss the cost of development
Ask for NDA and maintenance services
Follow these points while hiring app developers for Android devices.